The cosmetics industry is booming and lash brushing is an essential part of the makeup process. In addition to the factor of the mascara, the quality, style and material of the lash brush will also give a different effect. For this reason, mascara brushes are a very important part of the cosmetic packaging industry. Also, as it is a product that comes into direct contact with the skin and is a part of a complete brush. Then the problem of appearance, safety and assembly needs to be taken into account and its quality is very demanding.
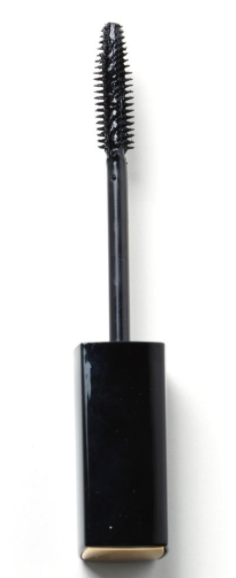 1.Product Structure
The brush head is made up of the rod and the bristles. The rod is closely related to the assemble, while the bristles determine the users experience.
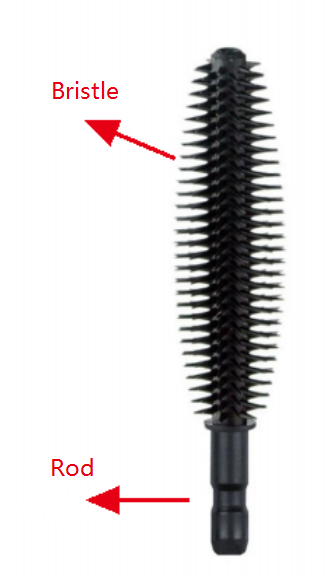 2.Material and characteristics
Normally, the material to make the brush is divided into 2 types: Nylon + Steel or TPEE.
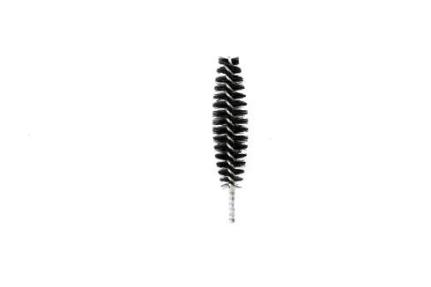
Bristles of Nylon+ rod of Steel
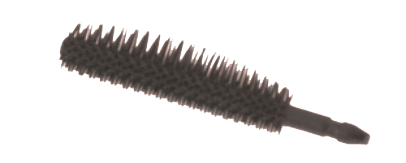
TPEE
Characteristic:
Nylon bristles are softer and therefore more difficult to cut during manufacturing, and because the bristles are made from a different material than the brush shaft, the production process is more complex and involves more steps.
TPEE mascara brushes are one-shot injection molded and have stiffer bristles than nylon.
3.Appearance and shape
The brush part is a delicate and fine product, and each different model has different functions.
For example:
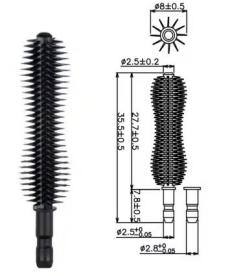
A.Thin curly type
The gourd-shaped design has a large force-bearing area in practical use, which can improve eyelash more curl,suitable density,simple and practical.
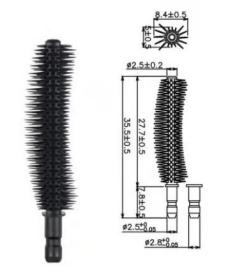
B.Slim type
The design on both sides is different, long hair can have the effect of slenderness and distinct roots; short hair design can make eyelashes more curly.
Just from this small piece, a Chinese factory will be able to have more than 200 shapes.
4. Preparation before manufacturing
4.1Confirmation of product design drawings
Before product manufacturing, the customer will provide a design of the desired product, including product shape and dimensions. Design drawings allow us to visualize the shape and structure of the product.
5. Process of production
5.1 Process of injection
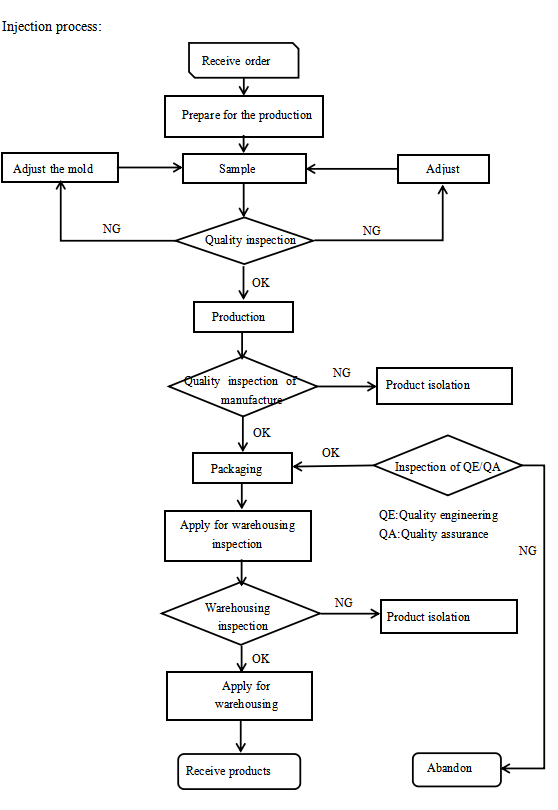
*Sample making
It is very important to make samples before producing large quantities, to know if the factory has the capacity to produce the product and if the design of the product needs to be adjusted, etc.
*Product Assembly Test
The produced samples need to be assembled and tested with the other components, and the diameter of the brush head must match the size of the rod. That is the most important thing during the test.
*Modification of product drawings and tolerance margins according to the problems of the trial assembly process
If the dimensions do not match or other problems are detected during assembly, the product design, tooling, etc. will have to be readjusted. to resolve and improve situations.
*Repeat the processes above
*Sample Confirmation
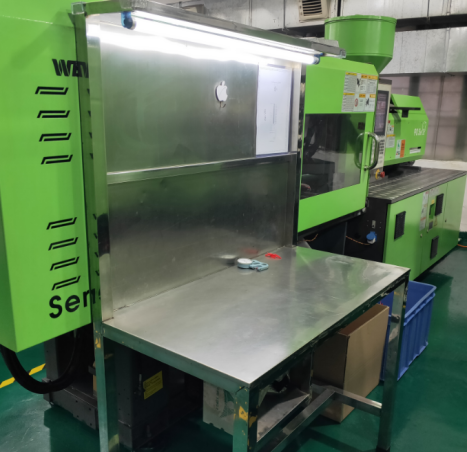
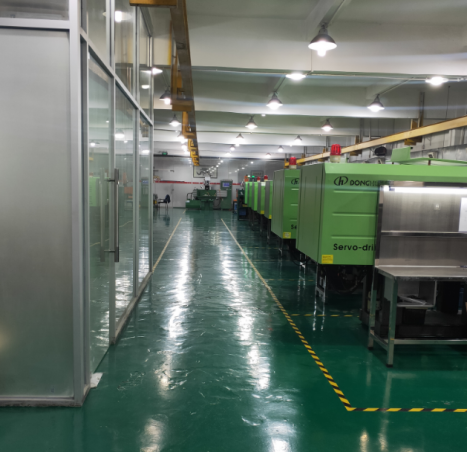
Photos of factory
6. Quality inspection
6.1 Inspection process
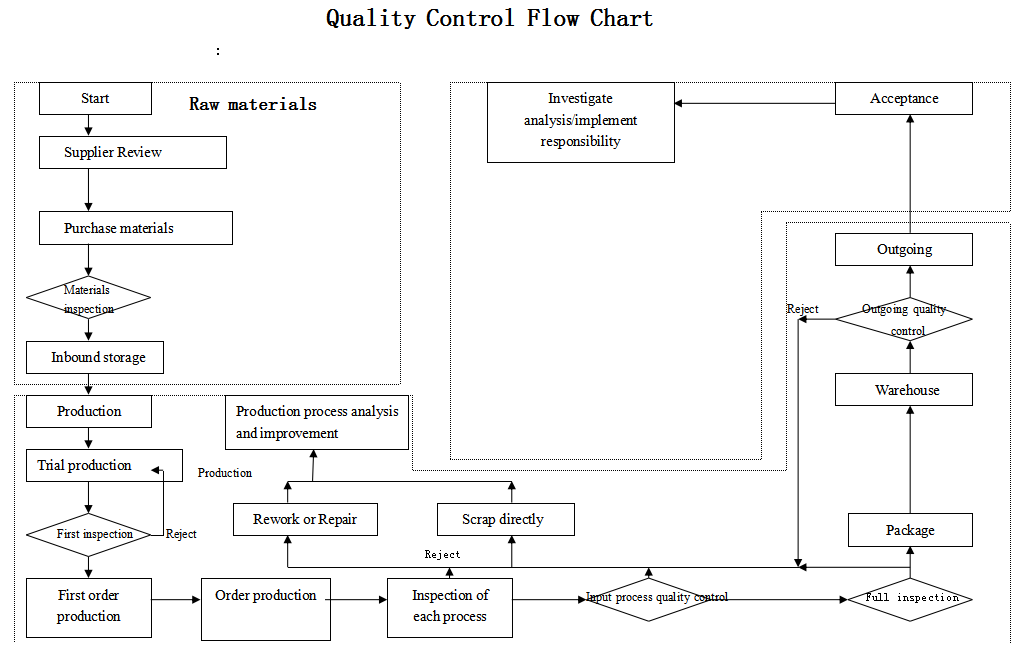
In the photo above, it is the complete process of the inspection to control the quality. The purpose of the quality control diagram is to control the process precisely and clearly through the diagram, thus achieving quality control.
6.2 Quality inspection standards
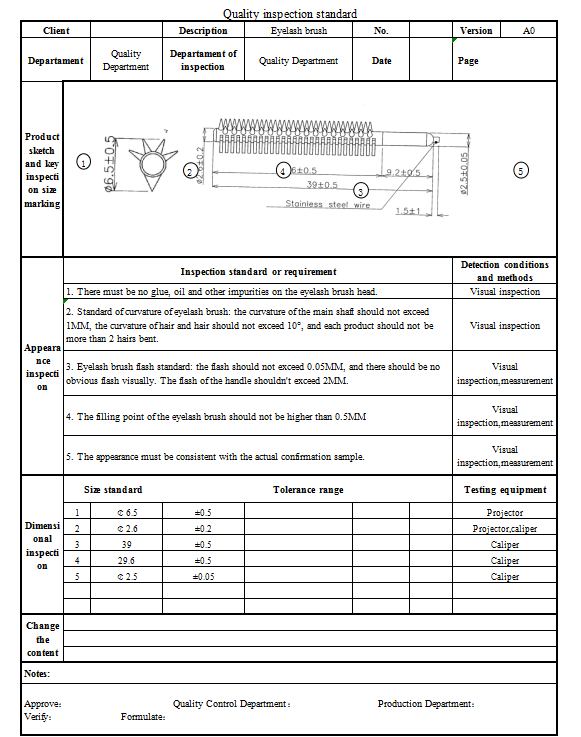
The factory will inspect the product according to the quality inspection standards indicated as the photo above, which includes the dimensions of the key parts of the product and different inspection standards and requirements of appearance and dimensions.
6.3 Confirmation of inspection standards
The following defects are not acceptable.

Bristle deformation
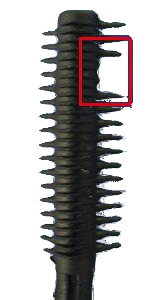
Burnt appearance/incomplete brushes
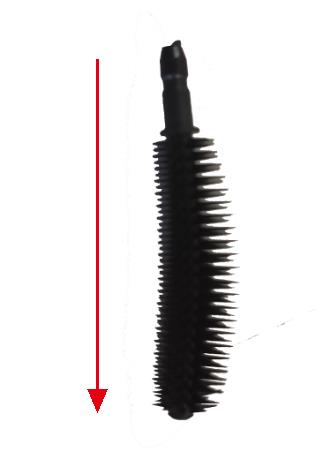
Bended brush
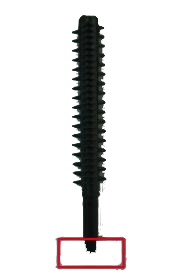
Flash
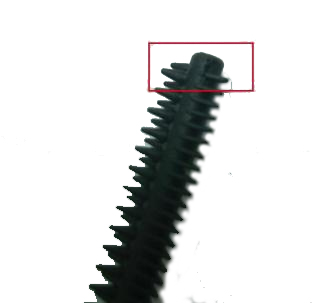
Fissure
6.4 Manufacturing completion and quality inspection
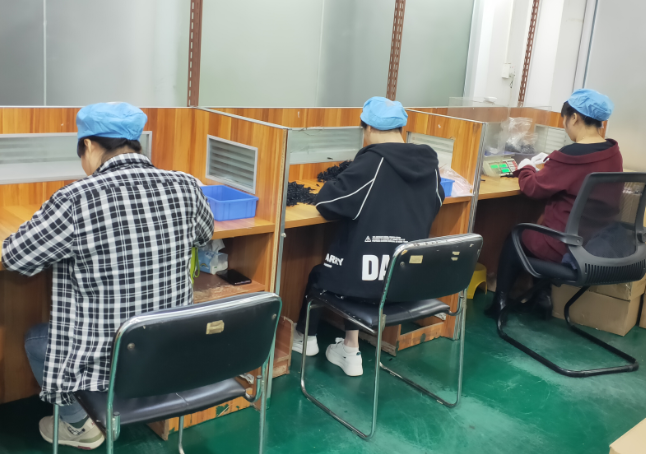
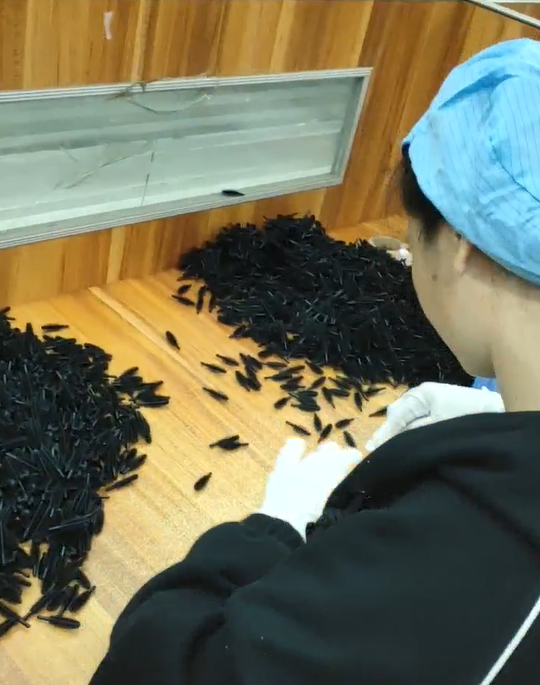
After finishing manufacturing, workers are doing inspection and packing.
6.4.1 Measurement and inspection instrument
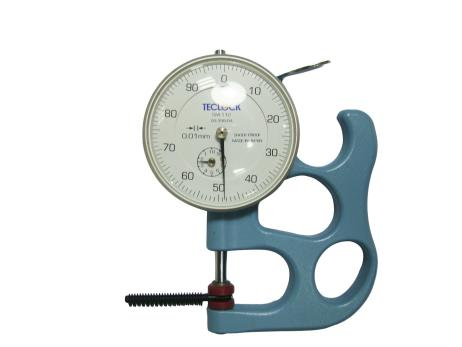
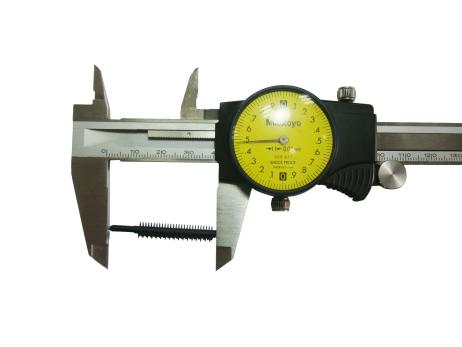
The inspection is usually carried out visually and with measuring instruments such as calipers. For detailed parts, tools such as magnifying glasses are used.
6.4.2 AQL
Being a low-volume but high-quantity product, lash brushes are usually purchased in units of 10,000. To implement a 100% complete inspection, it is almost impossible. How does a professional china agent? The AQL (Acceptance Quality Limit) form can be used to assist in the inspection of goods. It is always used in professional and serious inspection.
It is divided into 2 parts.
Part 1:
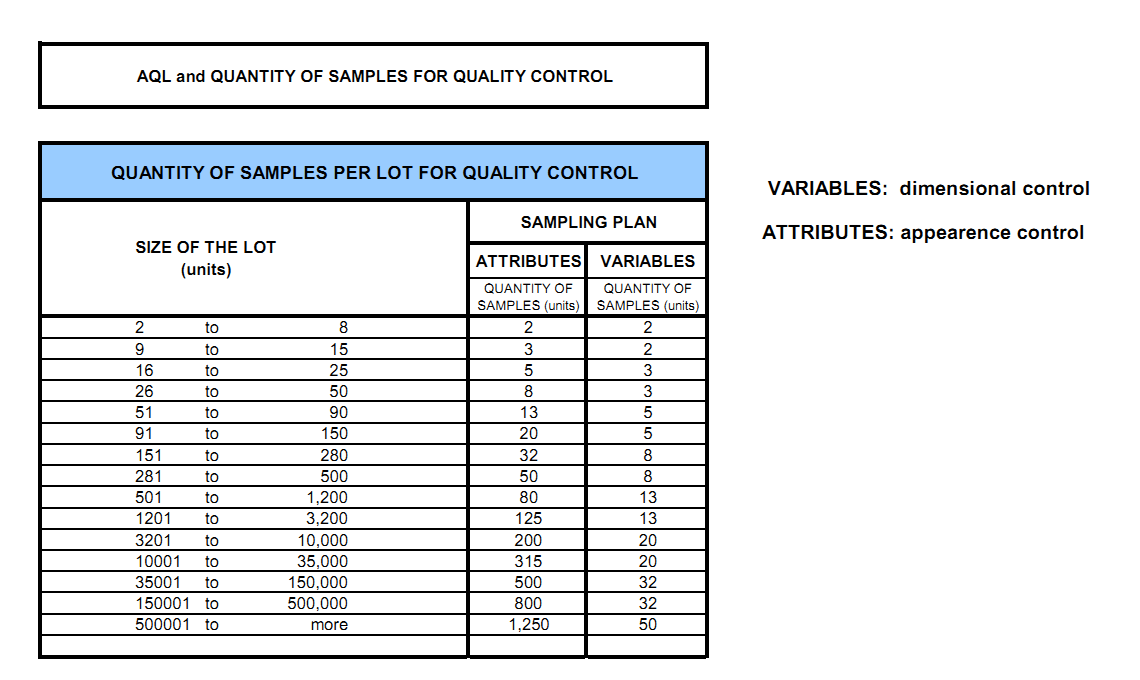
A number of samples are taken from the batch of product, and the exact number is based on the chart above. For example, in an order, 50,000 pcs of brushes are purchased, then 800 pcs are taken out as samples to inspect the appearance of brushes, and 32 pcs to see if the measurement is up to standard.
Part 2:
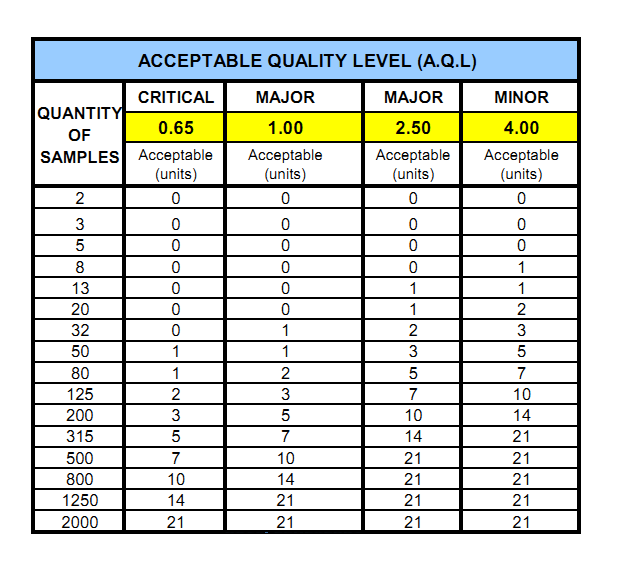
After the samples are drawn, we use another part of the chart to define whether this lot of merchandise is qualified.
The defects found in the inspection process will be divided into 3 grades according to their severity: 1.Critical: fatal defect. 2. Major: Some major cosmetic or functional defects in the primary defective product. 3. Minor: Minor defects, such as minor flaws in product appearance, such as minor scratches on the product surface, minor poor printing, etc.
Under the different grade, the acceptable quantity is also different. For example, for bristle drop, we select the norm is 0.65. So among the 800 sample units, the maximum amount that this situation can have is 10 units. Regarding the measure, among the 32 pcs, any does not meet the requirements cannot appear.
The ones below are a few details that focus on.
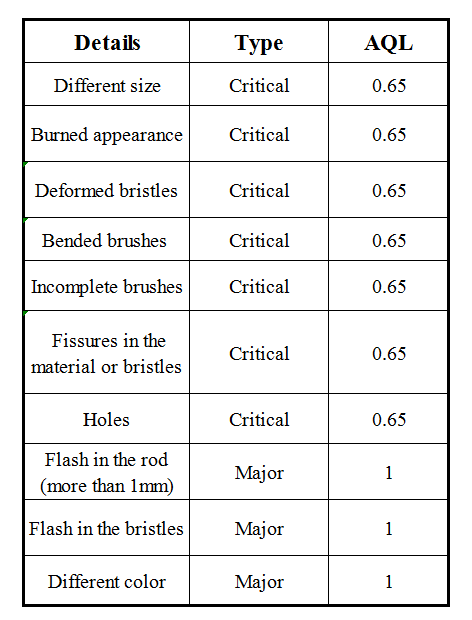 6.4.3 Quality inspection report
Real example
Appearance inspection
Here is a real report.
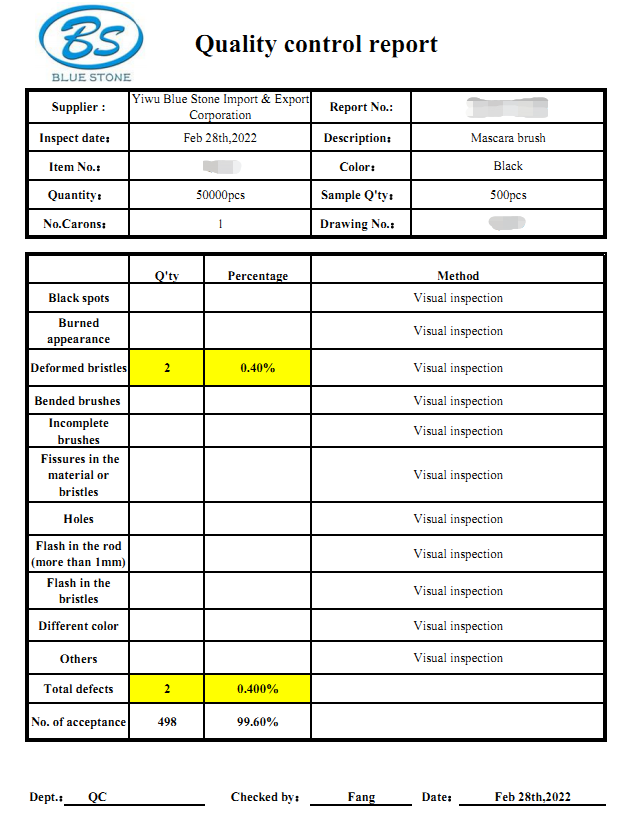
There were 50,000 brushes in this batch, and according to AQL, 500 were sampled and checked for cosmetic defects. The appearance of each product is carefully checked according to the requirements of the table to confirm whether it meets the requirements.
According to the above table, it can be known that among these 500 pieces, 2 pieces have the defect of brush deformation.
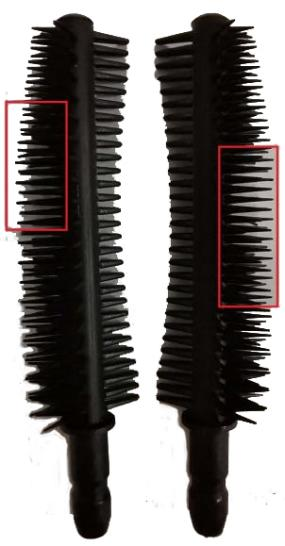
Photo of bristle deformation
Measurement inspection
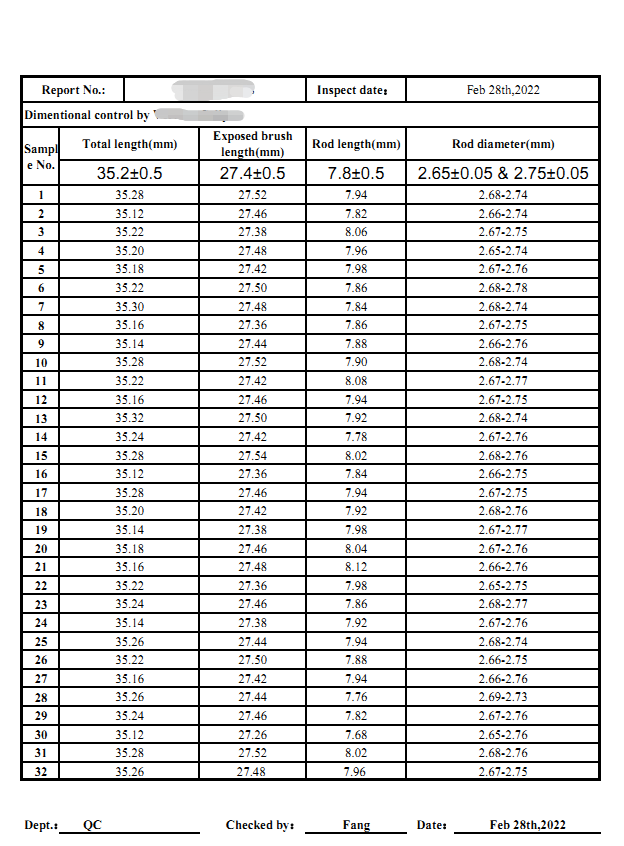
And the following is the report on the measurement.

Referenced Design

Measurement of different parts of the 32 pcs of samples according to the design is measured and all data is recorded in this table. The measurement process is carried out with more precise calipers, with an accuracy of two decimal places.
When products are manufactured, there is always a measurement tolerance. For example, 1mm±0.05mm means that 0.95mm to 1.05mm is acceptable.
According to the report, all samples are acceptable.

 7. Situations y solutions
7.1 Situation produced during transportation and manufacturing
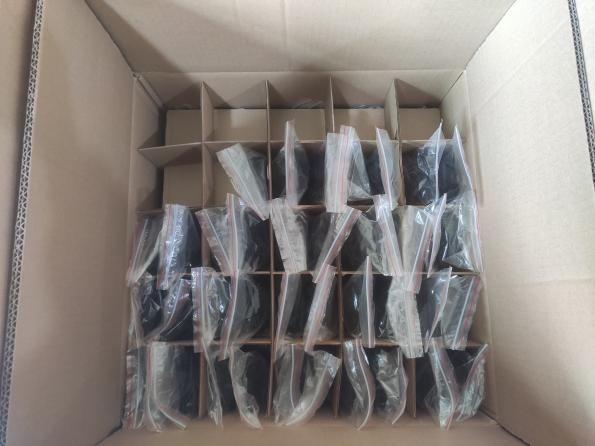
In general, the reason for the deformation of the bristles is that sometimes, in order to save volume, the unit package contains too many products, and the products are squeezed for a long time, causing the deformation of the bristles.
Also, based on the design above, you can see that the diameter of the bar doesn't just have a number, but in different places, they have different diameters. Because when they are manufactured, it cannot be guaranteed that the cut of the bar is a round.
7.2 Solution
How does a professional purchasing agent deal with these situations?
For deformation, it is to reduce the number of products per packaging unit and not to constantly compress the space between products in search of volume reduction.

And how is the indefinite diameter measured? Measure by turning the bar, to see if the measurements are correct.
Identify the problem, find the cause and solve the problem. These are the 3 most basic steps of the product quality inspection process. Product quality inspection is a difficult process, but at the same time, an essential part of the process before the product leaves the factory. In order to receive the high-quality and well-inspected products,
a professional purchasing agent can help you when you can't.


 Bristles of Nylon+ rod of Steel
 TPEE
TPEE


 Photos of factory

 Bristle deformation
  Burnt appearance/incomplete brushes
 Bended brush
  Flash
Flash Fissure


 Photo of bristle deformation